



Mosaic borders and corners
9 March 2022
Marble mosaic, pieces of marble in various creative shapes attached to a sheet. These mosaics are offcuts from large marble slabs, so they are highly sustainable! The beautiful deep colours, such as black, grey and white, predominate, but green or pink is also possible in the marble. They are also available in various laying patterns and shapes, such as hexagons, herringbone, brick bond or simple squares. Because the mosaic is supplied on sheets, it is fairly easy to install, which you would not expect when you see it.
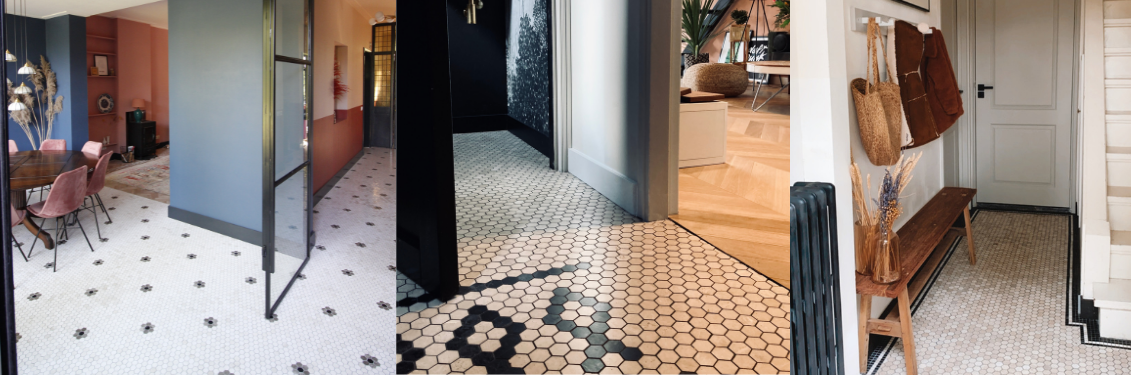
Creative with mosaic!
Because this mosaic consists of small pieces, you can add your own creative touch, such as a name or small flowers or stars in a different colour. How do you do this? You can easily swap the tiles for another colour and create your own pattern.
In addition to adding small shapes in different colours, we also offer the option of adding various borders, for example to give your hallway a truly luxurious look. These borders are also available with different patterns or can feature a different pattern or colour from the one you have used. The border can be finished with a zigzag pattern or in a single colour.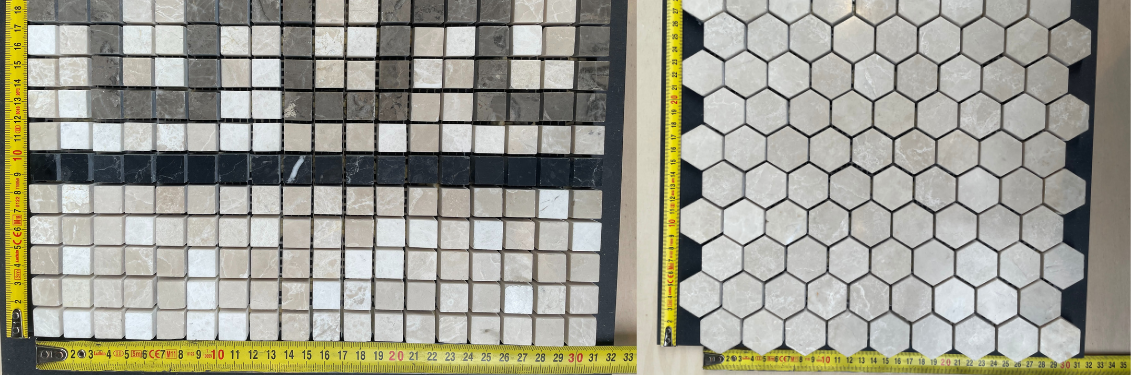
How do you calculate what you need?
If you choose one type of mosaic without a border, you can simply calculate the m2. However, would you like a matching border? Here are some tips.
Tip 1: First, it is important to know how much space the border will occupy. For the product you want to buy, check the dimensions of the complete sheet, 30 cm for example. Then take the total surface area and subtract the dimensions of the border (on both sides). What remains is the size of the inner section! Calculate the inner section by multiplying the length by the width.
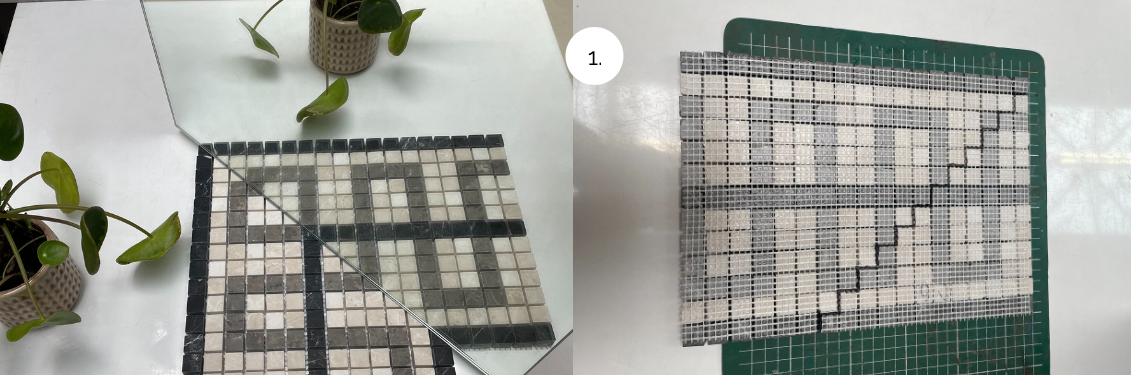
How to make the corner
You can make the corner tile of the mosaic yourself using 2 borders. This takes a little puzzling, so we explain it step by step here.
Step 1: The mosaic is attached to a sheet, which you can easily cut into with a Stanley knife. Do this in stages, as shown in the photo. Start with one border.
Step 2: Place the cut border against an (as yet) complete border at 90 degrees. The pattern may not be neatly mirrored, as shown in the example. By sliding the cut sheet downwards, you can find the perfect (mirrored) connection. See the example.
Step 3: Cut off the remaining piece at the top of the complete sheet. It is then still possible to replace individual mosaic pieces with a matching colour in the pattern. See the example.
Step 4. Cut the remaining sheet to size diagonally, also in stages.
The corner is not the same length on both sides (it is isosceles), so bear this in mind when centring your floor in the room.